Description
This document explains the steps required to complete the SSL configuration after installing version 3.3, in case the operation could not be automated.
Requirements
- Manage for TEOS 3.3.x (or higher) On-Premise installed
- Access to the certificate used for TEOS 3.3, including the private key
1. Preparing required certificate files
TEOS 3.3 includes an additional installation for RabbitMQ. When updating to version 3.3, this installation is automated. If the TEOS installation is configured with HTTPS, it also requires a specific configuration for RabbitMQ. This process is automated as much as possible, but if the certificate used is not exportable on the server, not everything can be automated.
For the configuration to be complete, we need three certificate files in PEM format:
1) The CA certificate
2) The private key of the certificate
3) The public key of the certificate
Depending on the issuer of the certificate, these can either be downloaded directly or converted. The conversion can be done with different tools. Below is an example of how to generate these files based on a .pfx file using OpenSSL.
Example: Generate private key file called private-teos.pem from .pfx
Openssl.exe pkcs12 -in -nocerts -nodes -password pass:" " | Openssl.exe pkcs8 -nocrypt -out "private-teos.pem"
Example: Generate public key file called public-teos.pem from .pfx
Openssl.exe pkcs12 -in $PFXPath -clcerts -nokeys -password pass:" " | Openssl.exe x509 -out "public-teos.pem"
Example: Generate CA key file called ca.pem from .pfx
Openssl.exe pkcs12 -in $PFXPath -cacerts -nokeys -password pass:" " | Openssl.exe x509 -out "ca.pem"
2. Installing the certificate and configuration
2.1 Placing the certificates
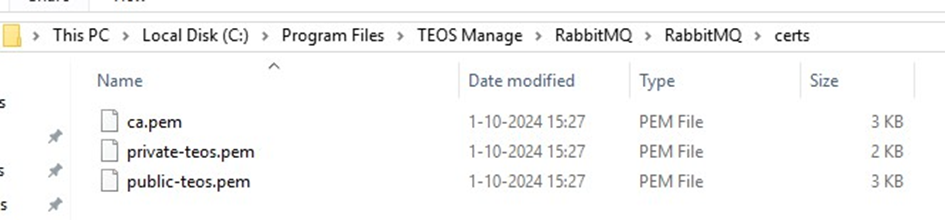
Once the three certificate files are available, place them on the server hosting TEOS. This can be done, for example, in:
C:\Program Files\TEOS Manage\RabbitMQ\RabbitMQ\certs
The directory should then look like this:
2.2 File configuration replacement
Next, we need to change a few configuration settings. We assume TEOS is installed in “C:\Program Files\TEOS Manage”, but if it is installed in a different directory, use that directory instead.
2.2.1 Appsettings
In the file “C:\Program Files\TEOS Manage\www\tdm5\appsettings.json”, change the following:
- Change every occurrence of “http://” to “https://”
- Change the port number “15675” to “15676”
- Change the port number “15672” to “15671”
- Change “Secure"": false” to “Secure"": true”
2.2.2 web.config
In the file “C:\Program Files\TEOS Manage\www\backbone\web.config” change the following:
- Search for “baseUrl” and change “http” to “https”
- Search for “playerBaseUrl” and change “http” to “https”
2.3 RabbitMQ Configuration
When the certificates are in place and the configuration files have been updated, the final step is to add additional configuration to RabbitMQ.
RabbitMQ uses the directory of the admin account used to install the update. For example:
C:\Users\Administrator\AppData\Roaming\RabbitMQ
This folder will look like this: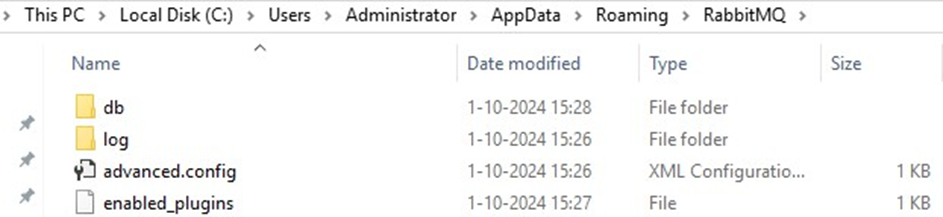
Create a new file called “rabbitmq.conf”.
Add the following content to this file. Replace the path to the .pem files with the path where you placed your certificate files if necessary.
listeners.ssl.default = 5671
ssl_options.cacertfile = C:\\Program Files\\TEOS Manage\\RabbitMQ\\RabbitMQ\\certs\\ca.pem
ssl_options.certfile = C:\\Program Files\\TEOS Manage\\RabbitMQ\\RabbitMQ\\certs\\public-teos.pem
ssl_options.keyfile = C:\\Program Files\\TEOS Manage\\RabbitMQ\\RabbitMQ\\certs\\private-teos.pem
management.ssl.port = 15671
management.tcp.port = 15672
management.ssl.cacertfile = C:\\Program Files\\TEOS Manage\\RabbitMQ\\RabbitMQ\\certs\\ca.pem
management.ssl.certfile = C:\\Program Files\\TEOS Manage\\RabbitMQ\\RabbitMQ\\certs\\public-teos.pem
management.ssl.keyfile = C:\\Program Files\\TEOS Manage\\RabbitMQ\\RabbitMQ\\certs\\private-teos.pem
web_mqtt.tcp.port = 15675
web_mqtt.ssl.port = 15676
web_mqtt.ssl.backlog = 1024
web_mqtt.ssl.cacertfile = C:\\Program Files\\TEOS Manage\\RabbitMQ\\RabbitMQ\\certs\\ca.pem
web_mqtt.ssl.certfile = C:\\Program Files\\TEOS Manage\\RabbitMQ\\RabbitMQ\\certs\\public-teos.pem
web_mqtt.ssl.keyfile = C:\\Program Files\\TEOS Manage\\RabbitMQ\\RabbitMQ\\certs\\private-teos.pem
After this file has been created and saved, the final step is to restart the RabbitMQ service. To do this, open the Services console (services.msc in Run), find the service called “RabbitMQ”, and select “Restart”.
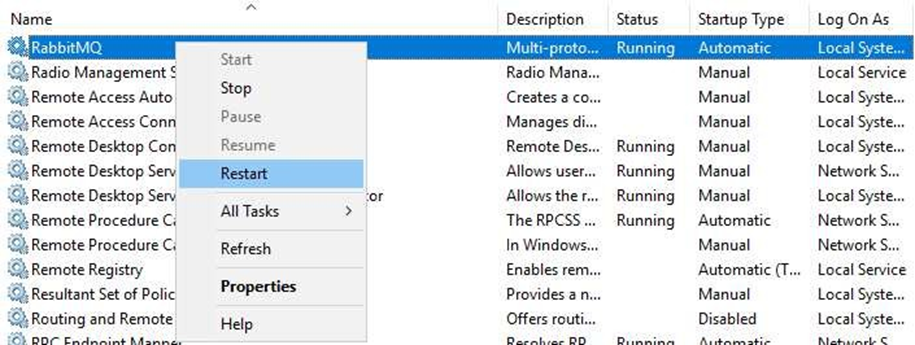
The SSL configuration is now complete.